What do you think of when I say laser engraver? Do you, like me, imagine an industrial device that takes up half a room and requires a team of almost two people to operate? Or maybe something so complex that just looking at it makes you want to grab your head from the buttons, wires, and endless settings?
Creality Falcon A1
Assessment:
What did we like?
What didn't we like?
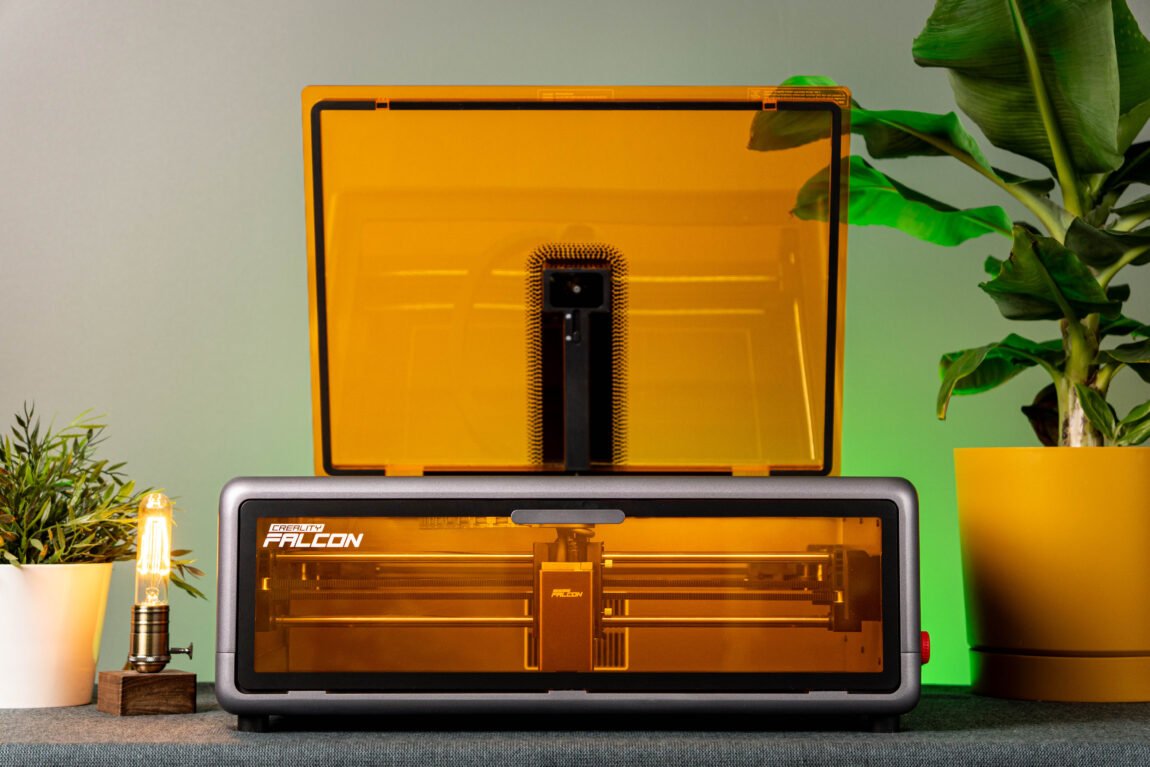
Creality Falcon A1 is a completely different laser engraver. It is designed so that a person can take the device out of the box, connect it and after a few minutes engrave their first project. Although it is only a 10W diode laser, the Falcon A1 leaves the impression of a much more serious device. The closed structure, the camera, the working area reaching 381 x 305 mm and the CoreXY mechanics - all this is more reminiscent of a modern household device, and not something to be afraid of.

Of course, 10W of power doesn't work miracles and you start to see the limits pretty quickly, especially when cutting thicker materials. However, it was in the engraving area that the Falcon A1 surprised me more than I expected.

Unpacking
One of the biggest advantages of the Falcon A1 is that it requires virtually no assembly. The device comes out of the box almost completely ready, all you have to do is connect the wires. Full setup? About 5 minutes.
")
First impressions
The device itself looks very solid. The construction is heavy, stable and definitely does not leave a "toy" impression. The closed housing significantly reduces psychological anxiety before the first use. Falcon A1 has a class 1 safety certification, and if the door is opened during operation, the laser automatically stops, so the fear of doing something wrong evaporates quite quickly.

The first start-up is very simple. Once everything is connected, I connect the USB cable to the computer and download the Falcon Design Space program. True, the 1.5 meter USB cable included in the kit could really be longer, because the computer has to be kept quite close to the engraver. After selecting the Falcon A1, I manually focus the distance between the laser and the material and the program starts the first engraving for testing.

Falcon Design Space program
Due to its simplicity, this program is clearly aimed at beginners. And on the one hand, it really works - just import an image, "place" it on the material, select the parameters and you can start, practically without understanding anything about lasers. The integrated camera allows you to quite conveniently select the engraving location, but the accuracy here is more approximate than precise.

Why? The Falcon A1 uses a fisheye camera - an ultra-wide-angle lens with quite strong image distortion. Because of this, the camera must be calibrated manually. This is done with the help of a wizard by photographing a calibration sheet in nine different positions. The problem is that even after many attempts, I was unable to achieve the ideal result - the image still remains slightly distorted, and the engraving usually "runs away" by at least a few millimeters. And this is where the natural question arises - if all Falcon A1s use the same camera, why is it not normally calibrated at the factory?

After a few days of use, I learned to rely only on the initial position of the camera. The Frame function turned out to be much more convenient. When using it, the laser moves around the boundaries of the future engraving, so it is much clearer where exactly the design will be located.

However, the more I used Falcon Design Space, the more I began to see the limitations of the program. It's not a bad program to start with, but the lack of features and strange bugs quickly become annoying. Sometimes the program refuses to start engraving because it thinks the door is open, even though it isn't. Other times, the work simply stops in the middle of the process.

That's why I started looking for alternatives pretty quickly. LightBurn is one of the most frequently recommended programs on forums, although it costs about 100 euros extra. However, once you try it, you can feel the difference very quickly - here you can use several different engraving parameters in one project, create more complex vector designs, texts, etc. Also, the layout of objects is much more convenient, project management is more normal, and file import options are wider. If you plan to use Falcon A1 more often, I would definitely recommend LightBurn.

Engraving on different materials
Engraving is where the Falcon A1 really impresses. The 10W laser spot is much smaller than, for example, 40W models, so the A1 can really outperform more powerful devices in terms of detail. The small laser spot allows you to get sharp lines, fine details and fairly clean transitions on a variety of materials.
")
The engraving results on plywood, wood (I tried it on pine, oak and maple) and MDF were excellent practically from the first try. The engraving is sharp, small details look neat, and the difference between superficial and deeper engraving was adjusted quite quickly. Even smaller texts or finer ornaments remained clearly visible.

It also worked great on felt, vinyl, and leather. However, I will warn you right away about the smell of the leather being engraved. If you have ever smelled burning leather, you will know what I am talking about. In this case, even a fume hood did not help as well as we would like. However, the result itself is very good, especially on lighter leather, where the engraving creates a sharp contrast. On black leather, there is no contrast at all, and the engraved part is only visible as slightly darker.

Engraving on stone or slate also looks very fun. It is in such materials that the Falcon A1 is able to squeeze out a very beautiful image. Photos or detailed drawings look better than I expected from a 10W laser. Only here it is very important to properly prepare the design - for some materials you need to invert the image, otherwise the result will be completely opposite to what you expect.

I was also pleasantly surprised by the engraving on cork. The engraved areas stand out very clearly from the rest of the surface, so the various designs look very aesthetically pleasing. The idea of making various coasters or decorations immediately came to mind, although it quickly became clear that working with cork is not as easy as it might seem at first glance. I will talk more about this in the cutting section.

I was able to engrave on cardboard as well, although it was really uncomfortable to watch the laser burn such a flammable material for the first time. Fortunately, with the right settings, everything went smoothly and without incident. Overall, the more different materials I tried, the more the Falcon A1 seemed like a device designed specifically for engraving.
(1)")
Cutting
The 10W power limit is felt quite quickly when cutting. The plywood included in the kit is cut practically without any difficulty, but the 4mm plywood bought in the store behaved completely differently. Here, more passes and lower speed were required, and as a result, the edges became much more burnt. True, the plywood itself determines a lot - the glue used, the quality of the layering, air gaps appear, so even visually similar panels can be cut completely differently.
The thickest 8mm plywood we tested was cut in three passes at a speed of 200 mm/s. Technically, the result is good, because the material was cut, but aesthetically, the edges already required additional sanding. If the goal is clean and beautiful cuts without additional processing, thicker plywood becomes a considerable challenge for a 10W laser. The Falcon A1 could no longer cut 10mm thick MDF.

Cutting cork was not a very pleasant surprise either. The problem is not that the Falcon A1 cannot cut it - the cut itself is quite easy. The biggest problem is the very badly burned edges, which do not look very aesthetically pleasing. Therefore, I would recommend using cork for engraving, and if you need specific shapes - it is easier to buy pre-cut blanks right away.

I also couldn't cut transparent acrylic properly. True, this is not just a Falcon A1 problem - diode lasers generally have a hard time dealing with transparent acrylic, because the laser beam simply passes through the material. In such cases, additional preparation is often required, for example, painting one side or otherwise coating the surface. Matte green acrylic was already cut, but the edges tended to melt and didn't look very clean. True, I didn't have cast acrylic specifically for lasers at hand - I probably used extruded acrylic, which is much less suitable for cutting.

Lighter materials such as vinyl, felt or leather are cut without any major problems. Here the Falcon A1 feels much more confident and additional passes are usually not needed.

What we didn't like?
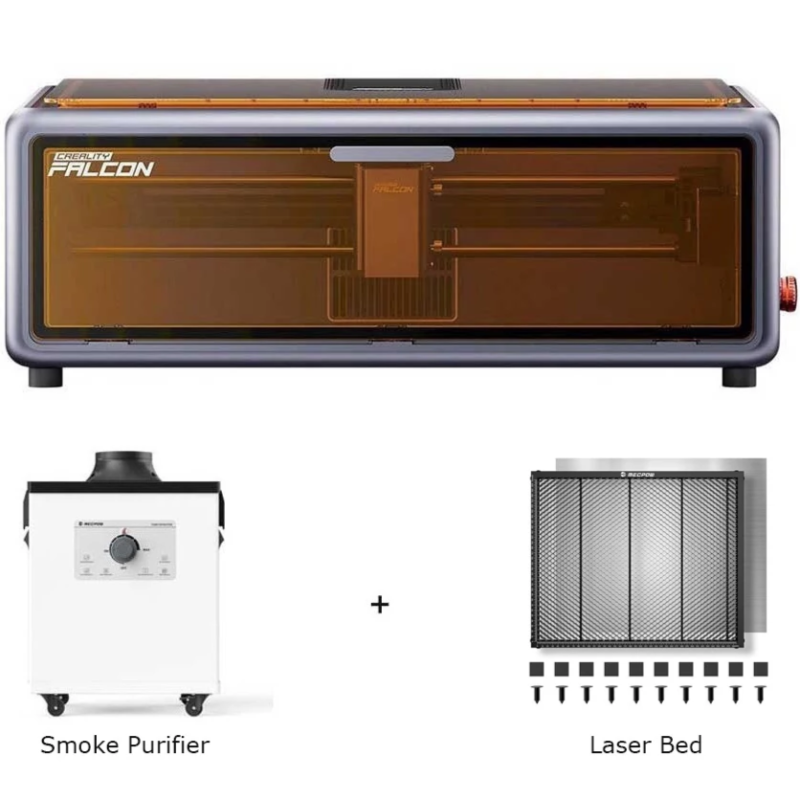
Although the Falcon A1 left a very good overall impression, it is certainly not ideal. First of all, I would really like to see at least a honeycomb workbench for cutting in the kit. This is a metal plate that raises the material being cut from the base and allows heat to dissipate better. This reduces burns from the back side, the cut becomes cleaner, and the material itself holds more stably during cutting. The problem is that such an accessory costs an additional 80 euros.

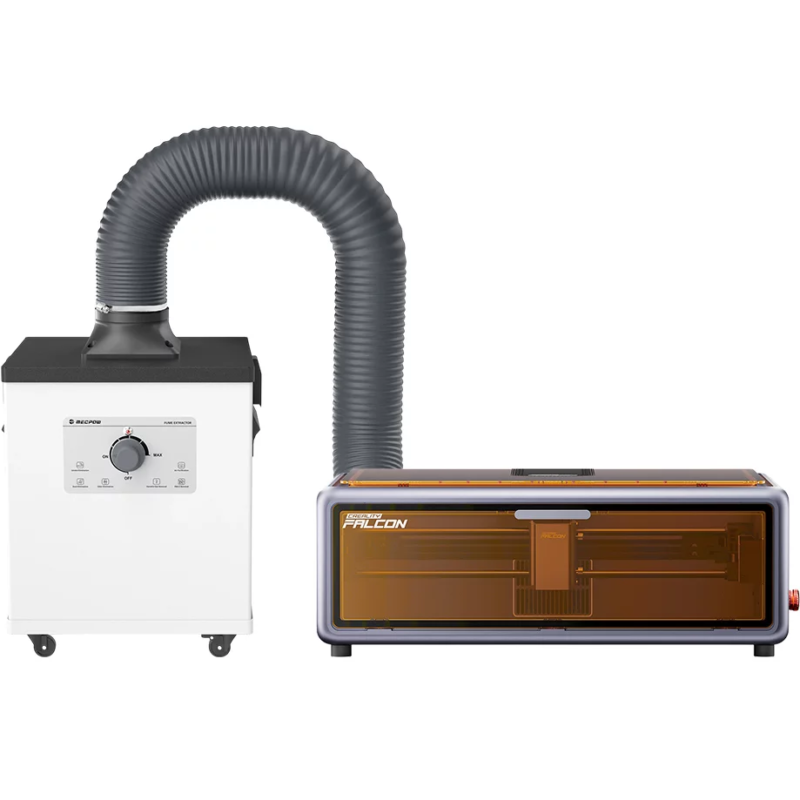
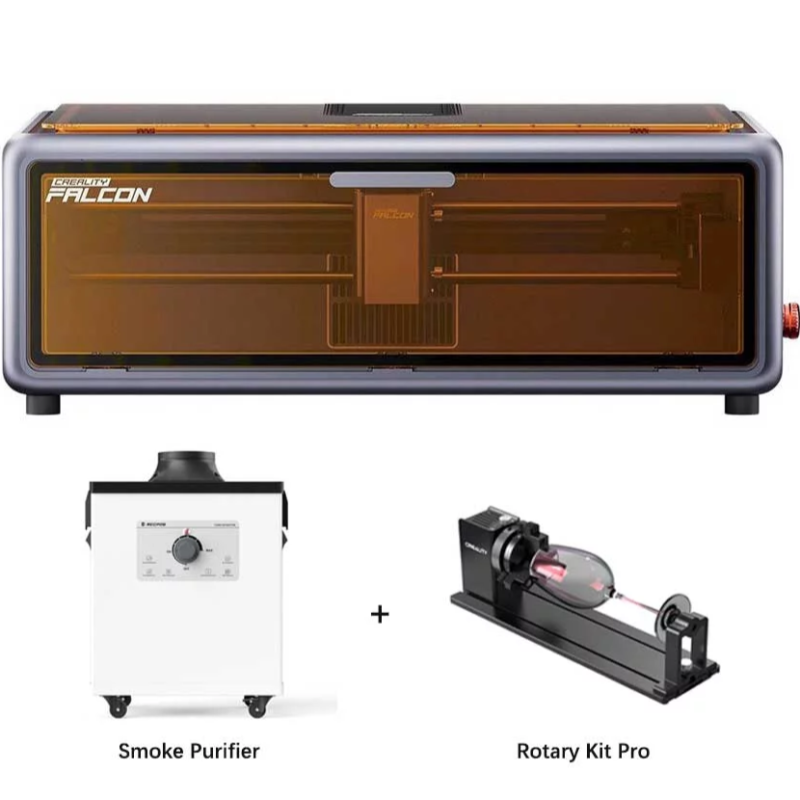
The same goes for a rotary kit if you plan to engrave on cylindrical objects - cups, glasses or bottles. The Falcon A1 itself is ready for this, but the rotary module must be purchased separately, and its price is about 150 euros. When you add a fume extractor and the LightBurn program, the whole ecosystem can end up costing more than the Falcon A1 itself.

Another thing that surprised me, not in a good way - the Falcon A1 only works when connected to a computer via a cable. After launching a project that lasted about an hour, I decided to return to my workplace and was quite unpleasantly surprised - as soon as I disconnected the USB cable, the engraving simply stopped. I would really like at least a minimal internal memory to which I could save the project and run it independently of the computer. Now, during work, the computer is practically "tied" to the engraver.

Verdict
The Creality Falcon A1 seemed to me to be one of the best options for someone who wants to enter the world of laser engraving without too much hassle. The biggest advantage of this model is not just the quality of engraving or the number of features. The most important thing is that it greatly lowers the barrier to entry. Here you don't have to spend half a day assembling the frame, adjusting the belts, or figuring out why the laser isn't going where it should.

The closed design, security solutions, camera and almost non-existent assembly allow you to start your first projects very quickly. And when you start experimenting with different materials, the Falcon A1 only reveals itself even more. The quality of engraving on wood, leather, stone or other surfaces is truly surprising, especially when you remember that this is only a 10W diode laser. It is in engraving that this device feels its strongest.

Of course, its limits become apparent quite quickly. Cutting thicker materials is not the Falcon A1's strongest point, the camera doesn't work as accurately as we would like, and in order to squeeze the most out of it, the budget for additional accessories starts to grow quite quickly. However, the overall impression is very good - this is one of those devices that allows you to spend more time creating, rather than fighting with the device itself.